
| Version 27 (modified by , 6 years ago) ( diff ) |
|---|
Installing Mumble on a desktop computer
These instruction cover installing mumble, the audio conference tool on a desktop computer. You can also install it on your android or iphones.
Please set aside about 10 minutes to complete the installation so you can properly run through the audio configuration wizard.
For best results use a headset or head phones.
Install
First, visit the mumble download page to get the version that's right for your computer.
Install the software.
Windows users: You almost certainly want to install the Windows x64 Snapshot version, not the regular Windows version
Mac users If you are using a recent version and this bug is not yet fixed, after installing mumble, you may need to go to System Preferences->Security & Privacy->Privacy->Accessibility and enable access for Mumble.
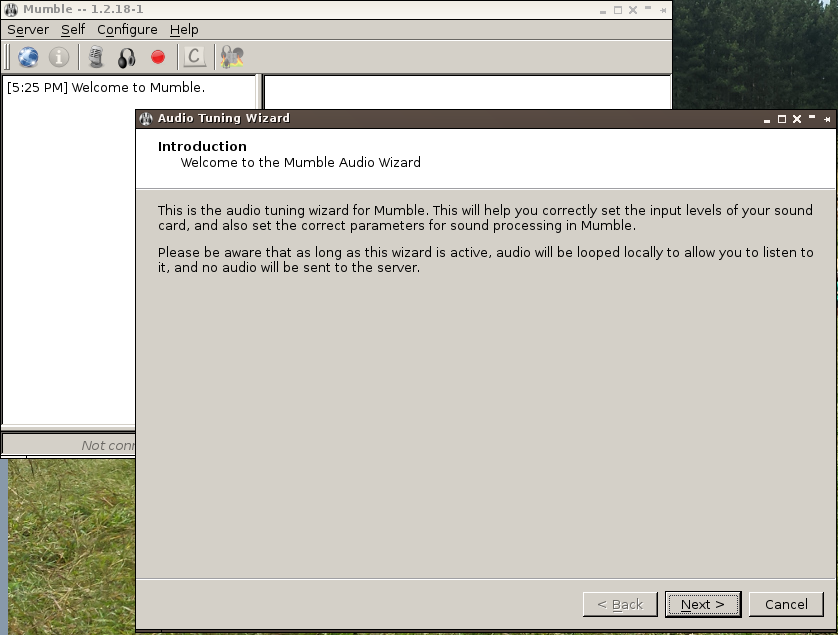
Audio Wizard
When you start Mumble for the first time, it will prompt you to follow the audio setup wizard.
This process has about 6 screens with questions and takes about ten minutes.
If you have a headset or head phones, please use them while doing the wizard (and for all mumble calls).

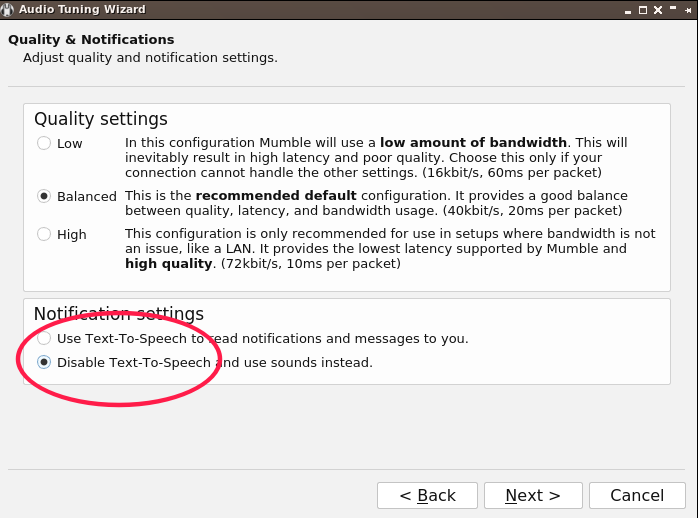
The fourth screen of the audio wizard gives you the option to turn off "text-to-speech" - that is a good idea. It is annoying to have everything people type converted to speech.

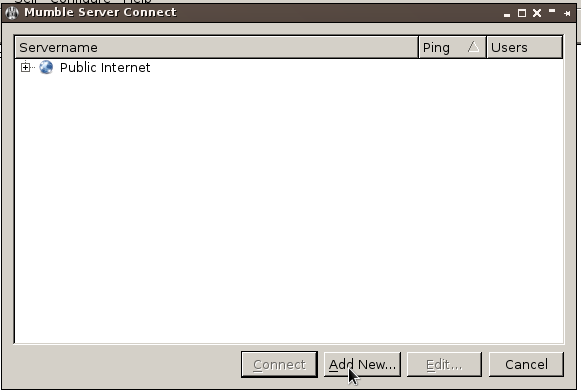
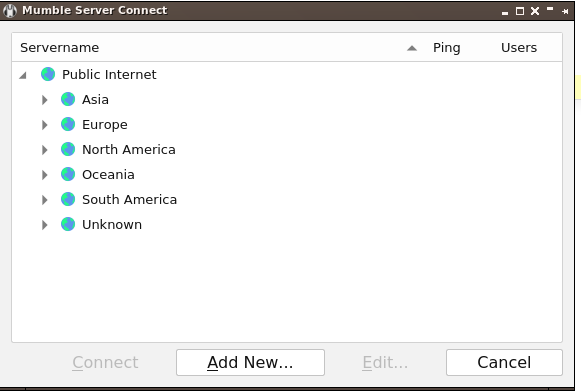
Add a server
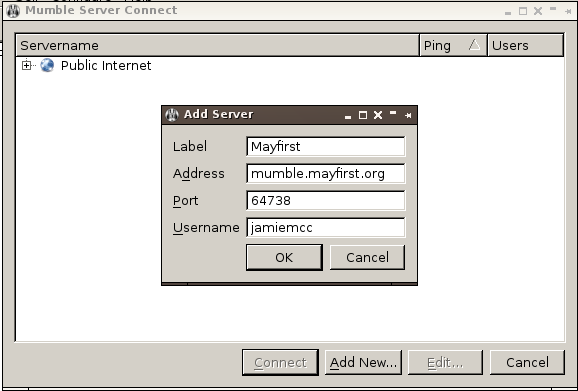
Next, you must tell mumble what server you want to connect to. Click the "Add new..." button.

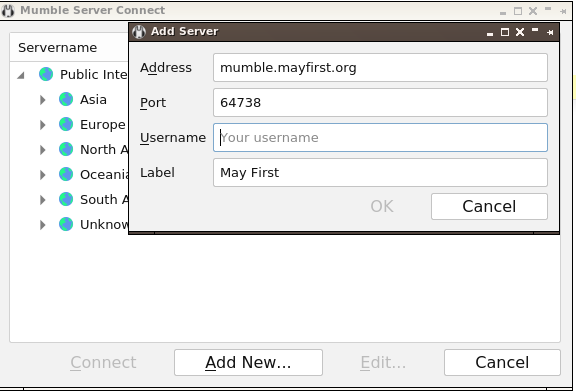
Please enter:
- Address: mumble.mayfirst.org
- Port: 64738
- Username: [choose your own username - try to pick something unique, not a common name like "john" ]
- Label: May First
Please note: If you are re-installing mumble or starting over, you must pick a new username. You can't use the same username twice.

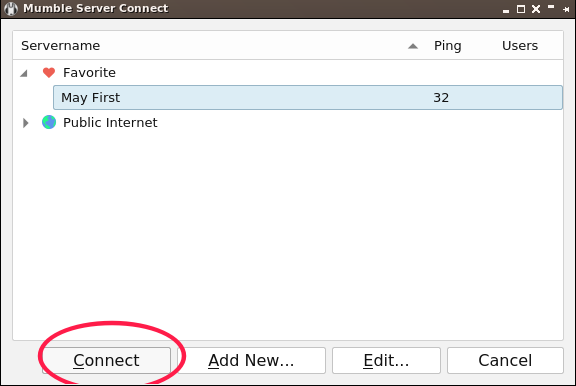
Connect to server
Now, you can click on the server you just entered and click Connect.

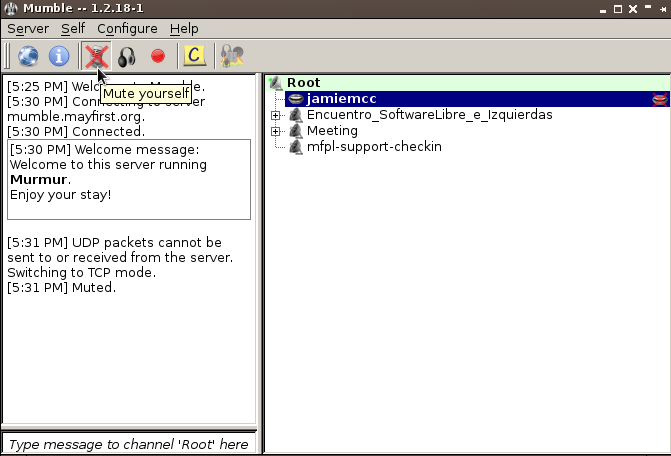
Mute
Once connected, be sure to mute yourself.

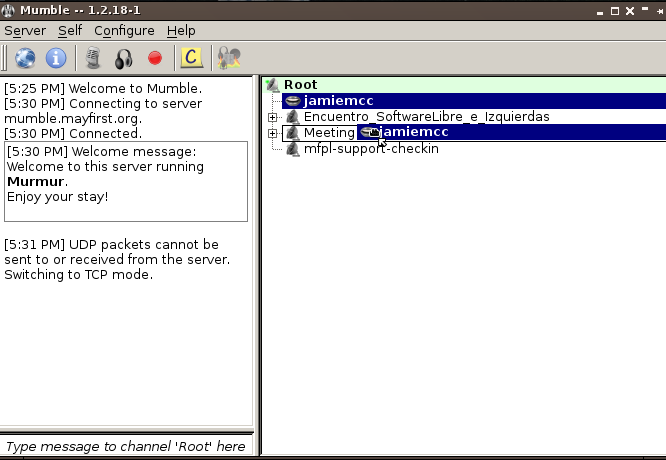
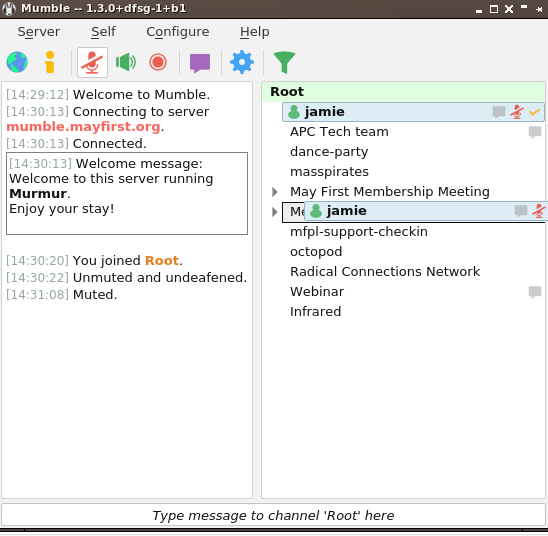
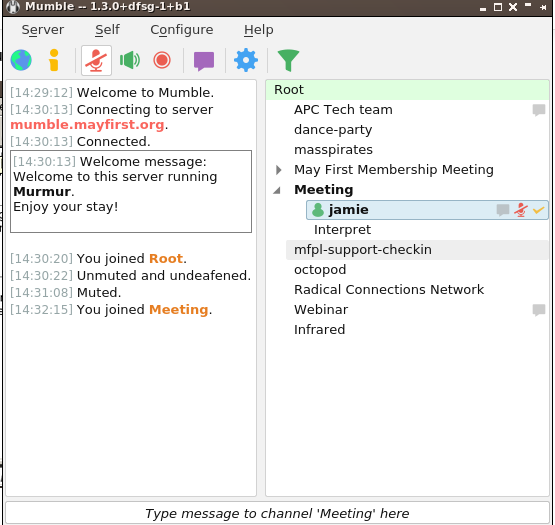
Join a meeting
You can join a meeting by dragging yourself to a channel (aka Meeting).

Once you have let go, you will appear in the room:

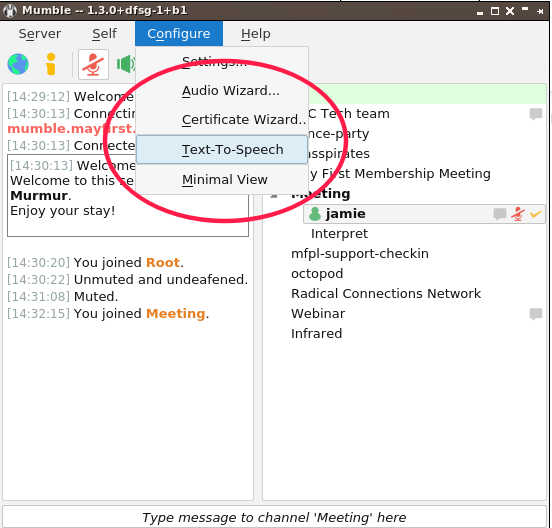
Turn off text to speech
Hearing all text messages is irritating. Turn it off by clicking Settings and ensuring there is no check mark next to the "Text to Speech" menu item.

Create your own Channel
Everyone can create a temporary channel for a meeting. However, when the person who created the channel quits, it goes away. If you want a permanent channel, please ask support.
To create a channel, right click the "Root" channel and select "Add...".

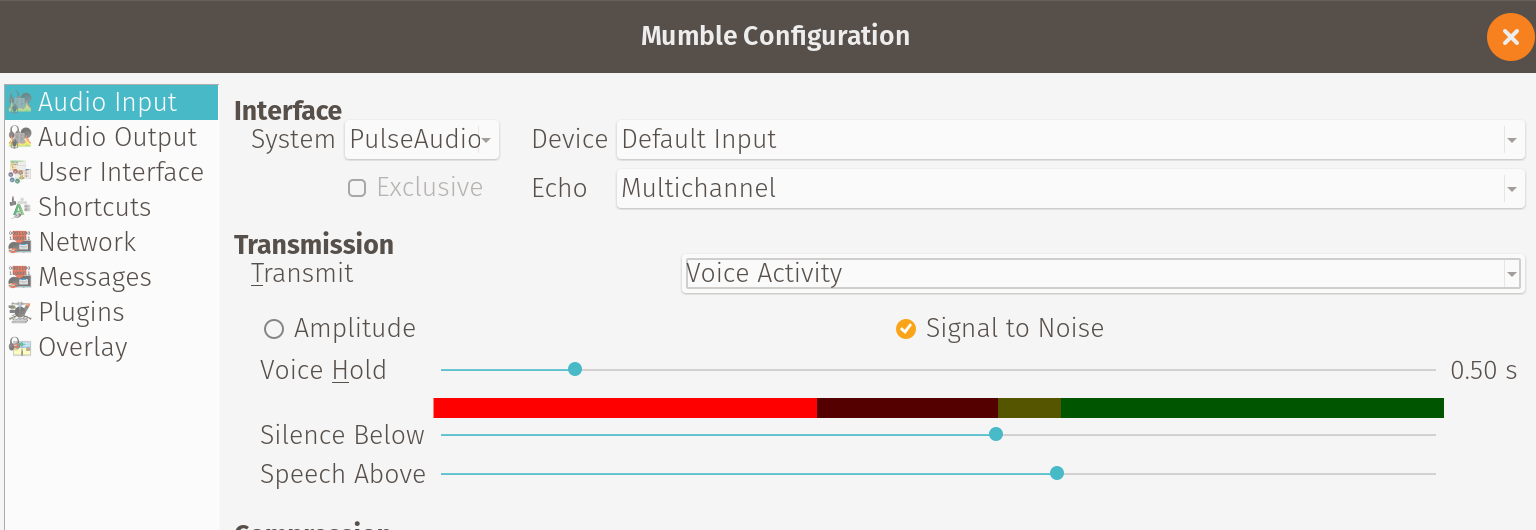
Transmission Settings
By default, your microphone will be activated when it detects that you are speaking. That's nice but it often means the first syllable is cut off.
For this reason, we recommend changing it.
You can configure it by clicking Configure -> Settings (or Preferences -> Settings on a mac).

The silence below and above sliders can be adjusted, but for certainty of being heard we suggest you change it to Continuous or Push To Talk.
Continuous
With continuous, your mic will always be open (unless you click mute). This is a good option if you don't speak often, Just stay muted and you can unmute yourself before talking.
Push to talk
The "push-to-talk" configuration is our recommended setting. It allows you to configure a button on your keyboard to act like a CB talk button - while you are pushing it down, your microphone is open and you can speak. When you let go, it is as if you are muted. This allows you to avoid constantly muting and un-muting yourself.
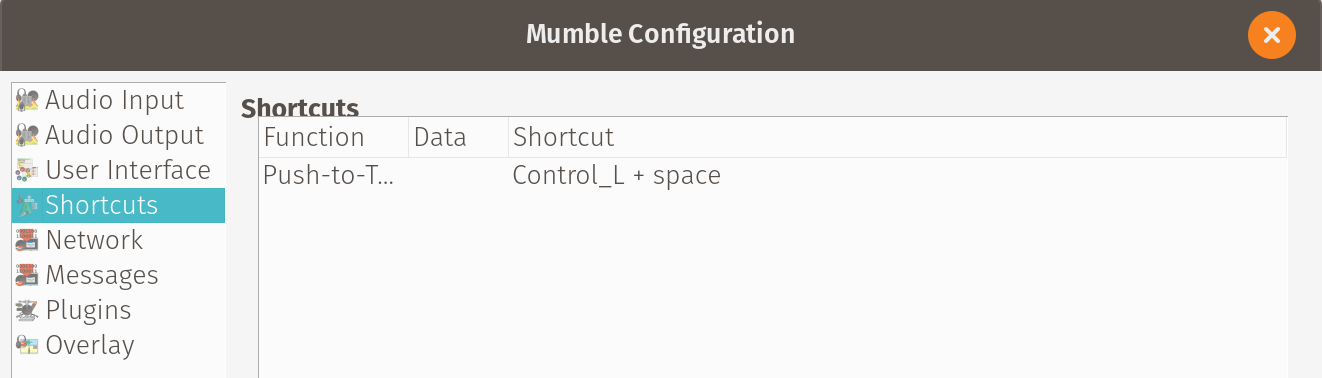
Then, you can configure a push-to-talk shortcut. This is done under Configure » Settings, Shortcuts.
Under the function column, select "Push to talk". Under the shortcut colunn, click in the box, then press the key you want to use. You can use a single key (like left alt key) or two keys together (like ctl plus space bar). Hint: Don't use a key that you normally use while typing.

In the Audio Input pane you can also checkmark "Display push to talk window" to get a floating always-on-top button you can click to talk, or of course switch to a different transmit setting. (If using Continuous instead, be sure to mute yourself when not talking.)
Attachments (20)
- mumble-add-new-server.png (11.7 KB ) - added by 9 years ago.
- mumble-audio-wizard-start.png (121.8 KB ) - added by 9 years ago.
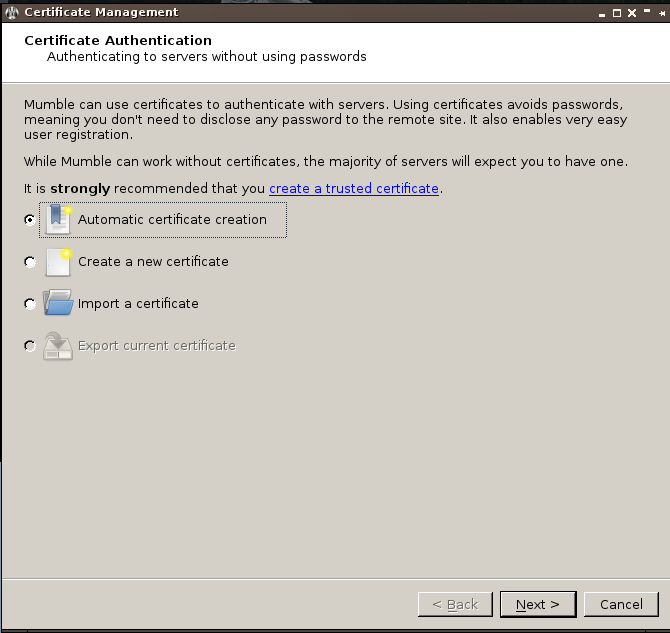
- mumble-certificate-creation.png (35.2 KB ) - added by 9 years ago.
- mumble-drag-to-meeting.png (35.9 KB ) - added by 9 years ago.
- mumble-enter-server-details.png (18.9 KB ) - added by 9 years ago.
- mumble-mute-mic.png (36.1 KB ) - added by 9 years ago.
- mumble-t2s-unchecked.png (26.6 KB ) - added by 8 years ago.
-
mumble-voice-activity.png
(90.3 KB
) - added by 7 years ago.
Mumble transmission settings: voice activity.
-
push-to-talk-shortcuts.png
(53.3 KB
) - added by 7 years ago.
Push To Talk shortcut settings screen
- create-channel.png (33.3 KB ) - added by 6 years ago.
- mumble-click-add-new.png (22.5 KB ) - added by 6 years ago.
- mumble-enter-server-details.2.png (30.7 KB ) - added by 6 years ago.
- mumble-audio-wizard.png (43.5 KB ) - added by 6 years ago.
- mumble-choose-from-favorites.png (24.7 KB ) - added by 6 years ago.
- mumble-disable-text-to-speech-wizard.png (67.4 KB ) - added by 6 years ago.
- mumble-drag-to-room.png (53.3 KB ) - added by 6 years ago.
- mumble-mute-yourself.png (55.5 KB ) - added by 6 years ago.
- mumble-now-in-room.png (56.5 KB ) - added by 6 years ago.
- mumble-turn-off-text-to-speech.png (61.6 KB ) - added by 6 years ago.
- mumble-connect-to-server.png (19.2 KB ) - added by 6 years ago.
Download all attachments as: .zip