
| Version 7 (modified by , 16 years ago) ( diff ) |
|---|
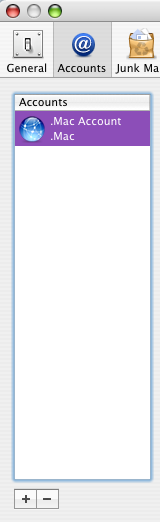
How do I setup Mac Mail to use May First/People Link email?
This tutorial is based on the default Mac Mail application, version 3.6 (OS X 10.5.8, Leopard). It assumes your domain name is fullofjoy.org and your username is joyfull.
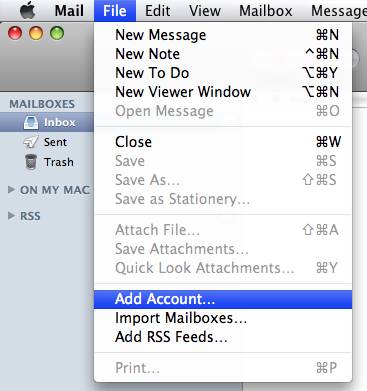
- From the File menu, select Add Account...

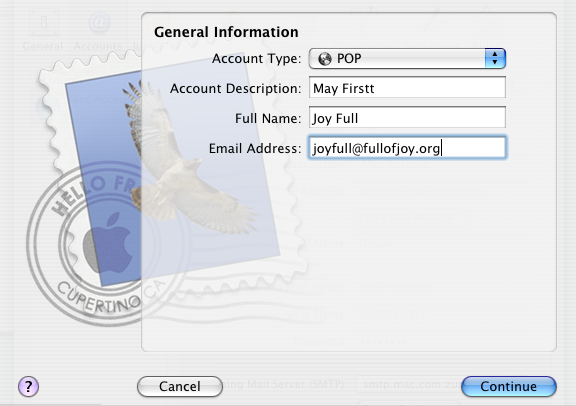
- Fill in your full name as you'd like it to be displayed on outgoing emails, your email address, and your email password. This password should have been assigned to you by May First or by your organization's account manager when your email account was created; it's the same one you use to access May First webmail. Click Continue.

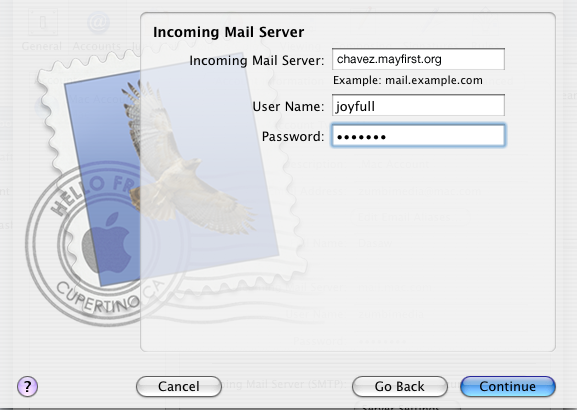
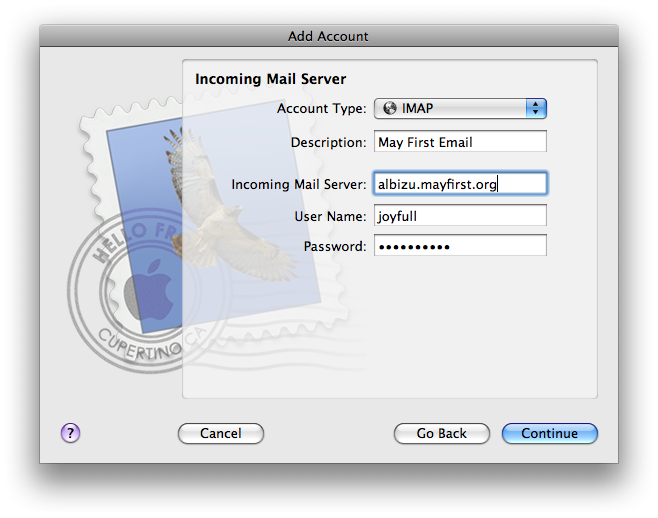
- Select either POP or IMAP from the Account Type dropdown menu. (For help understanding and choosing between the two, see this guide from our wiki.) Enter a Description that will help you remember what account this is. Enter your account's server address in the Incoming Mail Server field. This is the Server name that you choose when using May First webmail, all lowercase, followed by ".mayfirst.org". For example, if you select "Albizu" from the Server menu when logging into webmail, your incoming mail server is "albizu.mayfirst.org". You can also ask your organization's account manager or log into the May First Member Control Panel and check what your primary host is from there. Enter your account's Username and Password; again, these are the same username and password that you enter when logging into May First webmail. Click Continue.

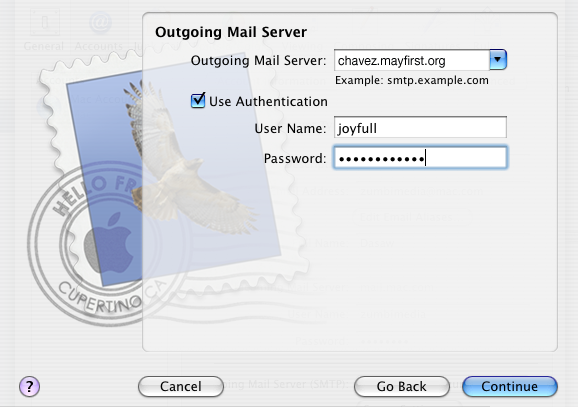
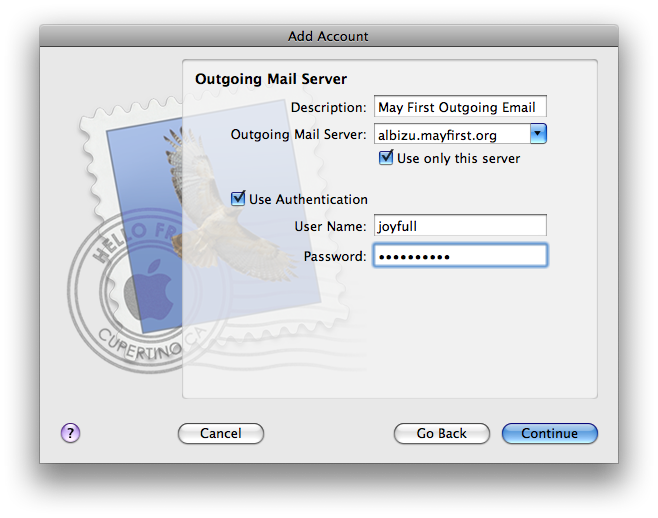
- Enter your outgoing mail server settings. Enter a Description that makes sense to you. Your Outgoing Mail Server is the same as the address you entered for your Incoming Mail Server, as are your Username and Password. Make sure that both Use only this server and Use Authentication are checked, then click Continue.


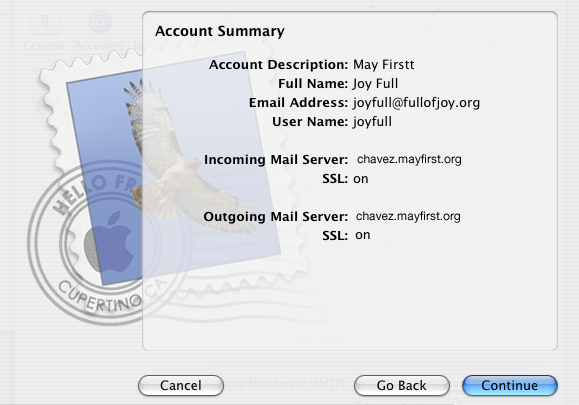
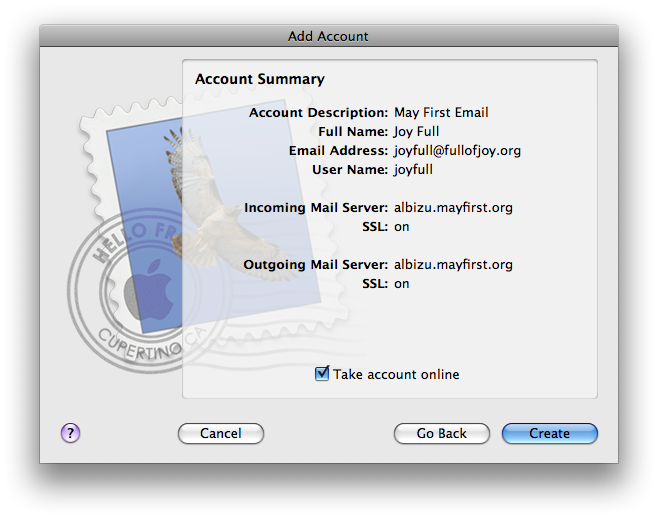
- You should see a summary like this.

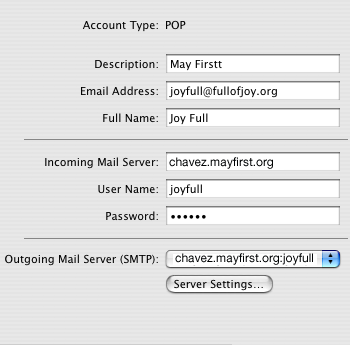
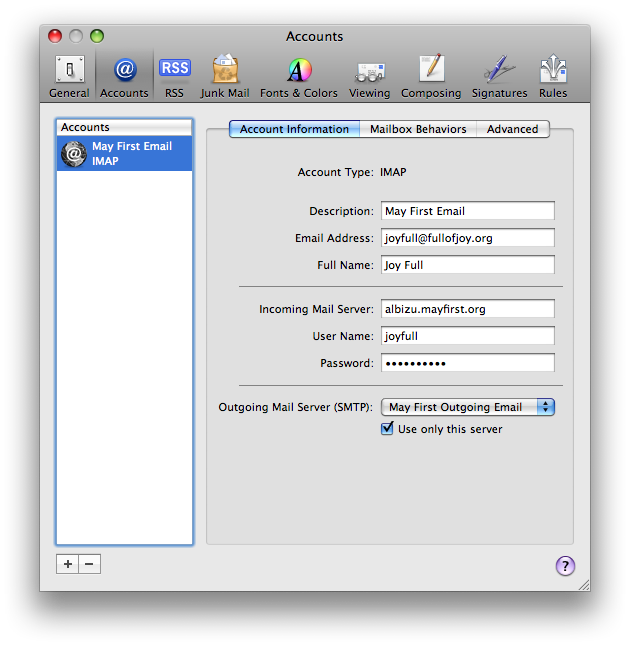
- When all is finished, it should look something like this:

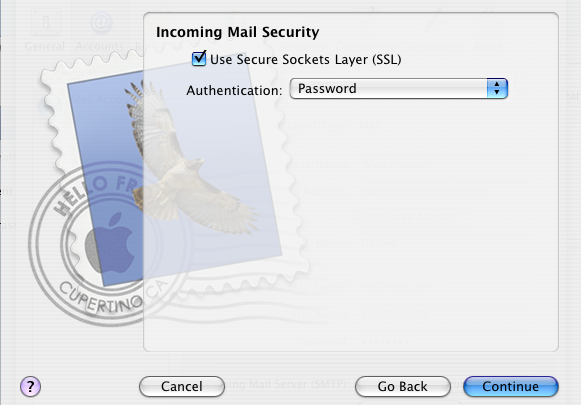
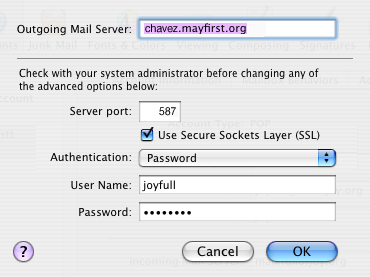
- Last step: If you click on Server Settings, make sure server port is set to 587, the SSL box is checked and the Authentication is set to Password.

This tutorial is dedicated with love, solidarity and joy to Prince and his dual monitor G5.
Attachments (26)
- macmail1.png (15.3 KB ) - added by 18 years ago.
- macmail2.png (111.4 KB ) - added by 18 years ago.
- macmail3.png (115.7 KB ) - added by 18 years ago.
- macmail4.png (25.8 KB ) - added by 18 years ago.
- macmail5.png (113.9 KB ) - added by 18 years ago.
- macmail6.png (117.6 KB ) - added by 18 years ago.
- macmail7.png (113.1 KB ) - added by 18 years ago.
- macmail8.png (121.1 KB ) - added by 18 years ago.
- macmail9.png (22.4 KB ) - added by 18 years ago.
- macmail10.png (33.2 KB ) - added by 18 years ago.
-
macmail_addaccount.png
(65.1 KB
) - added by 16 years ago.
Add account screenshot
-
macmail_accountinfo.png
(161.6 KB
) - added by 16 years ago.
Account Information
-
macmail_incomingserver.png
(158.9 KB
) - added by 16 years ago.
Incoming Mail Server screenshot
- macmail_outgoingserver.png (162.0 KB ) - added by 16 years ago.
- macmail_accountsummary.png (168.5 KB ) - added by 16 years ago.
- macmail_preferences.png (43.7 KB ) - added by 16 years ago.
- macmail_accounts.png (111.0 KB ) - added by 16 years ago.
- macmail_accounts_edit_outgoing.png (76.0 KB ) - added by 15 years ago.
- macmail_outgoing_advanced_settings.png (42.2 KB ) - added by 15 years ago.
-
macmail_accounts_advanced.png
(83.0 KB
) - added by 13 years ago.
updated version with correct port number for IMAP-over-SSL
-
Add-account.png
(109.0 KB
) - added by 11 years ago.
MacMail add account
-
incoming-mail-server.png
(99.4 KB
) - added by 11 years ago.
MacMail Outgoing Mail Server Settings
-
Outgoing-mail-port-setting.png
(129.0 KB
) - added by 11 years ago.
MacMail Outgoing Mail Server Settings
- Outgoing-server-info-pane.png (16.5 KB ) - added by 11 years ago.
- advanced-outgoing-server.png (93.7 KB ) - added by 11 years ago.
- final-account-info.png (91.8 KB ) - added by 11 years ago.
Note:
See TracWiki
for help on using the wiki.